Category Archives: Food at Home

Zucchini, Basil, and Parmesan Egg Bake

Yesterday I picked up my share of vegetables from my CSA, Frog Bottom Farm. In it was two pounds of mixed summer squash (I picked zucchini, barq squash, and beautiful, bi-colored zephyr squash), four beets (with tops still attached), five really long spring onions, a cucumber, a bag of arugula, and a bag of basil leaves.

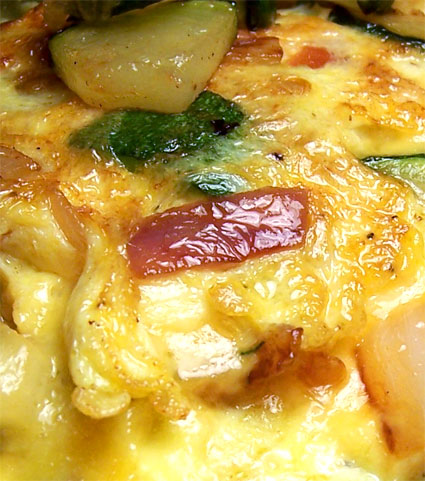
I decided to use some of the squash, green onions, and basil in a baked egg dish that turned out really well. I had some of the leftovers this morning for breakfast, and I can confirm that baked egg type dishes do, in fact, reheat nicely!

Zucchini, Basil, and Parmesan Egg Bake

Zucchini, Basil, and Parmesan Egg Bake

It’s sort of like an eggy lasagna.

Recipe for Zucchini, Basil, and Parmesan Egg Bake (Serves 4, more or less):

What you need:

  • 8 eggs (preferably cage-free)
  • 3-4 slices whole wheat bread
  • 1 pound zucchini or summer squash, sliced thinly
  • 2-3 green onions, sliced
  • 1 handful fresh basil leaves, cut into thin strips
  • 1 roasted red bell pepper (jarred works just fine), sliced into strips
  • 1 cup grated parmesan cheese
  • 2 Tbsp. olive oil
  • salt and pepper, to taste
How to do it:
  1. Preheat the oven to 375 degrees. Heat 1 Tbsp. of the olive oil in a pan over medium heat. When the oil is hot, add the zucchini and saute until the zucchini is cooked through and lightly brown around the edges.
  2. Use the remaining 1 Tbsp. of oil to grease a 9 x 13 inch baking pan. Beat the eggs in a bowl. Add salt, pepper, the green onions, the basil, and half of the parmesan cheese.
  3. Arrange the slices of bread in the pan so that the bottom of the pan is covered by a layer of bread. When the zucchini is cooked, layer the zucchini and roasted red bell peppers on top of the bread. Pour the egg-basil-onion-parmesan mixture over everything, allowing the egg to soak down through the bottom layers. Sprinkle the rest of the parmesan cheese on top.
  4. Bake at 375 degrees until the eggs are set and the cheese is melted. For me, this took around 25 minutes. Let the dish cool slightly, then slice into squares and serve hot.
Zucchini, Basil, and Parmesan Egg Bake

When it looks like this, it's done!

This dish would also be delicious with caramelized onions, but I was fresh out of those. A nice side dish would be a green salad. We ate ours and then gorged ourselves on local strawberries and blueberries that we bought at the farmers’ market where we go to pick up our weekly CSA veggies, which is held every Saturday at St. Stephen’s Episcopal Church in Richmond, Virginia. If you can bring yourself to get up early on a Saturday, I heartily recommend the St. Stephen’s Farmers’ Market!

Southern Vegetarian Meal

This meal was delicious! It consisted of vegetarian sloppy joes, using beans and veggies instead of meat with a homemade sauce, homemade corn bread, and cooked greens (leftover from a takeout barbecue meal).

Southern Vegetarian Meal

Southern Vegetarian Meal

The recipe for the sloppy joe beans was modified from a Rachael Ray recipe for “Sloppy Veg-Head Joes.” I added different veggies, like carrots and celery, a can of red kidney beans, and a couple tablespoons of natural ketchup (no high-fructose corn syrup!) instead of the brown sugar. It came out very tasty and went great with the cornbread.

The cornbread was a modified version of Mark Bittman’s recipe for cornbread. I used plain lowfat yogurt instead of buttermilk, and instead of sugar, I used three tablespoons of maple syrup to make maple cornbread. I use variations of Bittman’s cornbread all the time. It’s easy, relatively healthy, and most importantly, it’s delicious. You can find Mark Bittman’s recipe for good old fashioned cornbread here, on his website.

Maple Cornbread

Maple Cornbread

I’ve been experimenting with this cornbread recipe ever since I made it the first time. Vegetable additions like sliced green onions, fresh cooked corn kernels, or shredded zucchini all work well.

Chicken and Sausage Gumbo

Dinner tonight was chicken and sausage gumbo with brown rice. This version has a ton of vegetables, including onions, celery, bell peppers, tomatoes, okra, and green onions and uses smoked turkey sausage and shredded rotisserie chicken. It is spicy, smoky, and extremely satisfying.

Chicken and Sausage Gumbo

Chicken and Sausage Gumbo, Simmering Away (click for larger image)

Boyfriend helped by picking the store-bought rotisserie chicken off the bone and shredding it and by making me a delicious gin and tonic.

We ate the gumbo with a big scoop of hot, cooked brown rice added right on top. The savory, spicy tomato broth soaked into the chewy brown rice and made the dish absolutely delicious. I loved all the different textures and tried to get a little bit of each ingredient in every spoonful. Aaron’s favorite part was (as always) the smoked sausage.

Chicken and Sausage Gumbo with Brown Rice

Chicken and Sausage Gumbo with Brown Rice (click to enlarge)

Chicken and Sausage Gumbo Recipe (Serves 4):

What you need:

  • 3 Tbsp. olive oil
  • 3 Tbsp. flour
  • 1 large onion, diced
  • 2 green or red bell peppers, diced
  • 2 stalks celery, diced
  • 4 cloves garlic, finely diced
  • 3-4 green onions, diced
  • 1 package smoked turkey sausage, sliced
  • 1 (15 oz) can diced tomatoes
  • 4 cups (more or less) water
  • 2 bay leaves
  • 1 tsp. dried oregano
  • 1 tsp. creole seasoning (such as Tony’s), or to taste
  • Hot sauce (I recommend Tobasco’s chipotle pepper sauce), to taste (optional)
  • 1 package (12 oz.) frozen okra
  • 1 rotisserie chicken, picked and shredded
  • salt and pepper, to taste
  • 2 cups cooked brown rice
How to do it:
  1. Heat the oil in a large pot over medium heat. When the oil is hot, add the flour and cook, stirring frequently, until the mixture turns light brown. (Cooking fat and flour together in equal amounts results in a roux, which thickens the gumbo. You could make a darker roux if you have time and if you prefer, but a quick light brown roux worked for me just fine.)
  2. Add the onions, bell peppers, and celery to the pot and stir until the vegetables are beginning to soften. Add the sliced sausage and garlic and cook until fragrant.
  3. Add the canned tomatoes, water, bay leaves, oregano, creole seasoning, hot sauce (if using), salt, and pepper. Be careful not to add too much salt, as creole seasoning often contains salt. Stir and bring to a boil.
  4. Reduce heat to low, simmer for about 10 minutes, allowing the tomatoes and vegetables to break down and the flavors to marry. Add the okra and continue to simmer until the okra is cooked through, about another 10 minutes. If the gumbo seems too thick, you can add more water.
  5. Add the shredded chicken and green onions. Stir to combine. Cook for another 1-2 minutes, until the chicken is heated through. Taste and adjust seasoning.
  6. Serve the gumbo hot in bowls with scoops of brown rice and enjoy!

Sweet Potato Hash and Fried Eggs

It is time for a blog reboot. I have graduated with my Master’s Degree in Library Science (before you ask, yes, that’s a real thing), and I now have time, glorious time! I also have a new camera and quite a lot of new recipes to share with you.

So, I am breaking my blogging fast. In honor of that, my first post since 2009 (eegad!) shall be about breakfast. Specifically, my breakfast this morning, when I was tempted to go out to breakfast and spend quite a lot of money for someone else to cook for me, but instead I decided that it is probably better to cook with what I have here, in my pantry and in my fridge. Some of my favorite meals start this way.

I haven’t been to the grocery store in a while, but after scrounging around the kitchen I found some eggs, two sweet potatoes, and a vidalia onion. That, and a little oil, butter, salt, pepper, and cajun seasoning was all I needed to make a healthy, tasty, cheap breakfast for Boyfriend and me.

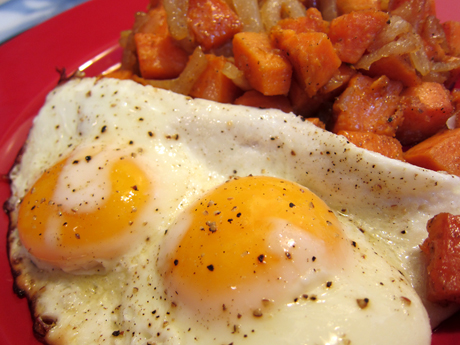
Fried Eggs and Sweet Potato Hash

Fried Eggs and Sweet Potato Hash (click for larger image)

Sweet Potato Hash Recipe (serves 2):

What you need:

  • two medium sweet potatoes, cut into 1-inch cubes
  • one onion (I used vidalia, but any kind will do), sliced
  • 2 Tbsp. olive oil
  • salt, pepper, and cajun season (such as Louisiana Cajun Seasoning), to taste
How to do it:
  1. Heat the oil in a skillet over medium heat. Add the onions and saute until the onions are beginning to soften.
  2. Add the sweet potato cubes to the onions. Sprinkle with salt, pepper, and cajun seasoning. Stir to coat the sweet potatoes with oil.
  3. Sautee the hash until the sweet potatoes are cooked through and can be easily pierced with a fork – this took me around 15-20 minutes.
  4. Taste, adjust seasoning, and enjoy!
The sweet potato hash is a nice change from home fries or hash browns. It is slightly sweet from the natural sugars in the sweet potato and the onion, and pleasantly spicy from the cajun seasoning.  Plus, sweet potatoes can be bought on the cheap (I bought mine at 99 cents per pound) and they are packed with healthy stuff, like beta carotene and fiber. One medium cooked sweet potato contains 438% of the recommended daily intake of Vitamin A, 4 grams of fiber, and has only 105 calories, according to the Nutrition Data website. I am declaring this sweet potato hash healthy, tasty, and cheap (not to mention easy as anything to cook).

Slow Cooker Turkey Chili

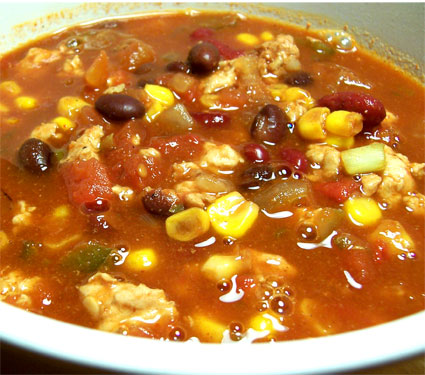
That little slow cooker I got a couple of weeks ago has been amazing! A couple of nights ago, I made a delicious turkey chili with beans in it. It looked like this:

turkeychili

Bubbly Bowl of Yumness

It consisted of ground turkey breast, tomatoes, kidney beans, black beans, onions, green peppers, chili powder, and smoked paprika. I also added some corn kernels – I don’t know if it’s “proper” to put corn into chili (I know a lot of people have strong opinions about whether it’s okay to add beans, too!) but I like the taste and color. When Aaron and I ate our bowls of chili, we added 2% shredded cheddar cheese and some (okay, lots of) reduced-fat sour cream. I sprinkled a few green onions on top for color and crispycrunch.

Mmm... hot chili with cool sour cream.

Mmm... hot chili with cool sour cream.

To make the chili, I made up my own recipe as I went along.

Slow Cooker Turkey Chili Recipe (makes 5-6 servings):

What you need:

  • 1 pound ground turkey breast
  • 1 medium green bell pepper, chopped
  • 1 medium red onion, chopped
  • 1 Tbsp. canola oil
  • 2 cans diced tomatoes (I like petite diced)
  • 1 can kidney beans, drained and rinsed
  • 1 can black beans, drained and rinsed
  • 1 cup frozen corn kernels (optional)
  • 2 Tbsp. chili powder
  • 1 Tbsp. cumin powder
  • 1 tsp. smoked paprika
  • splash of Tobasco sauce (to taste)
  • salt and black pepper to taste
  • reduced-fat sour cream, cheese, diced green onions, tobasco sauce, and/or baked corn chips for serving

How to do it:

  1. Put the tomatoes, kidney beans, black beans, frozen corn kernels, and spices into the slow cooker.
  2. In a large nonstick skillet, sautee the peppers and onions in the canola oil on medium heat. When the onions are soft, add the ground turkey and continue to cook, breaking the turkey up into small chunks with a spatula or spoon. When the turkey is browned and cooked through, add the turkey, bell pepper, and onion mixture to the crock pot and stir to combine.
  3. Cook the chili on high for 3-4 hours or on low for 8 hours. Season with salt, pepper, and Tobasco to your taste.
  4. Serve the chili hot in bowls with cheese, sour cream, green onions, and corn chips (I used Garden of Eatin’ Black Bean Chips) as you wish.

This was another super cheap slow cooker meal. The turkey was about $3, the bell pepper $0.60, the red onion $0.75, the tomatoes $1, the beans $1, the corn $0.50, and the spices and seasonings maybe $0.50. That brings us to $7.35 for the whole pot. Divided by five servings, that’s $1.47 per serving. Add $1 or so for sour cream, cheese, chips, and green onions, and it’s still only $2.47 per serving. Not bad!

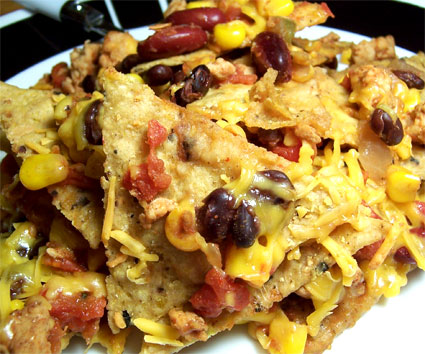
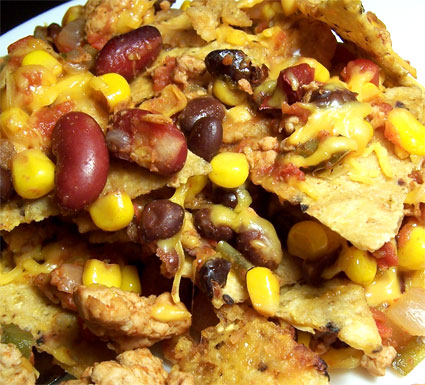
If you have lots of leftovers and are tired of eating this chili the same way every time, you could do what I did and make… nachos!

chilinachos1

Turkey Chili Nachos

To make the nachos, I just spread some baked Black Bean Chips on a foil-lined, cooking spray sprayed baking sheet and preheated my oven to 450 degrees Fahrenheit. I spooned the leftover chili on top of the chips and topped them with a handful of sharp cheddar cheese made with 2% milk. I baked the nachos in the hot oven until the cheese was melted and the chips were warm. Then I removed the nachos from the oven and happily crunched into them.

Melty cheese, crunchy chips, and spicy chili belong together.

Melty cheese, crunchy chips, and spicy chili belong together.

Vegetable Curry

Another great way to use up whatever odds and ends are left in the kitchen at the end of the week is a nice big pot of curry! This week, I picked up a jar of Patak’s Hot Curry Paste to make my life a little easier.

Image from amazon.com

Image from amazon.com

And it worked! I chopped up potatoes and carrots and threw them into a hot pot with a little canola oil and sauteed them for a few minutes until they were starting to soften. Then I added several tablespoons of the yummy curry paste and a can of diced tomatoes. I cooked a pot of instant brown rice alongside the big pot of bubbling curry. I added my frozen green beans, frozen corn, and a can of chickpeas. When the potatoes were tender, I added the chopped broccoli florets and a few already-cooked leftover green peas and cooked the curry for another five minutes or so. Then I turned off the heat and added about half a bag of spinach and a bunch of chopped green onions, stirring it all together until the spinach wilted. Aaron and I ate the curry on top of the hot cooked brown rice.

Lots and Lots of Vegetables Curry!

Lots and Lots of Vegetables!

I loved eating this because there were so many different colors, flavors, and textures in the bowl, and it makes me feel good to eat a meal with so many different types of vegetables.

I took this picture shortly before I had the idea of adding a few tablespoons of plain nonfat yogurt and a sprinkle of cashew nuts to the top. The yogurt added a lovely creamy texture and a tangy flavor that matched the flavor of the curry nicely. Be careful when adding yogurt to anything that is hot and bubbly, however. It can curdle!

Extreme Curry Close-up!

Curry Close-up!

The verdict on the Patak’s Curry Paste is a big thumbs up. It is much easier than me attempting to understand the mysteries of Indian spices, and it tastes very good. Previously, I had either tried to season curries on my own, or bought a jar of Patak’s Cooking Sauce. A jar of the cooking sauce costs about $3.50 and contains enough for about 3-4 servings, but a jar of curry paste costs around $4.25 and contains enough for 10 servings. Since I find that the paste is more cost-effective, that is definitely what I will buy from now on.

Scromblette with Onion, Zucchini, Tomato, and Cheddar

I used to make omelettes with vegetables and cheese and good things inside. But they always seemed to fall apart and get very messy, because I was horribly inept at flipping them. So now when I make eggs with veggies and cheese and good things, I make something in-between an omelette and scrambled eggs, and I really like it. I call them scromblettes, for scrambled + omelette. They are sort of scrambled up (I have accepted my inferior flipping skills and now make the most of the situation) but sort of flat and fluffy like an omelette. Here is a scromblette I made recently with two eggs, sauteed red onion, zucchini, fresh tomato, and 2% cheddar cheese.

Garden Veggie Scromblette!

Garden Veggie Scromblette!

After typing a draft of this post, I became curious about whether anyone else makes something like this. On urbandictionary.com there is an entry for “scromlette,” which reads as follows:

“Scrom-let – A sumptuous dish served only (as far as I know) at Kingfisher B&B in Worcestershire. It is essentially the bastard child of scrambled egg (scrom) and omelette (lette). It was created one bleary eyed morning after a heavy night on the good stuff as a result of a complete lack of culinary dexterity. Despite it’s shaky beginnings frankly scromlette is infinitely more delectable than either of it’s two inferior egg based parent dishes.”

So, apparently I am not the only one doing this! Scromblettes / scromlettes are happening in Richmond, Virginia and at a bed and breakfast in England. Interesting, although I could find no mention on scromlettes on the Kingfisher Bed and Breakfast website.

Scromblettes are Scrummy!

Scromblettes are Scrumderful (that's scrumptious + wonderful)!

Slow Cooker Red Beans and Rice

In the interest of finding new recipes to use with my new crock pot slow cooker, I checked out a couple of books about slow cookery from my local library. I picked up Cooking Light Slow Cooker and Fix-it and Forget-it Lightly. Cooking Light Slow Cooker is a hardcover with full-page, glossy pictures of each recipe, which I really like. I also like that I was able to get both of these for FREE at my library. (Since I’m currently working in a library and studying for my Master’s degree in Library Science, don’t be surprised to hear me toot the horn of the public library from time to time!) I just have to be careful not to spill any gravy on them.

Last night I made a recipe from Cooking Light Slow Cooker – Red Beans and Rice. You can view the recipe online here.

Red Beans and Rice with Turkey Sausage

Red Beans and Rice with Turkey Sausage

I made just a few minor changes to this recipe. I found that the beans were pretty much cooked after only 3 hours on high, so I turned it down to low for the remaining two hours. The beans had a great texture, very creamy and bean-y. I also used some Oscar Meyer turkey sausage. I couldn’t find the Healthy Choice brand the recipe mentions, and the turkey sausage seemed to have wayyy less fat and saturated fat than anything else in the sausage department. The nutrition facts are available from www.thedailyplate.com. It also tasted delicious, and I would definitely buy it again. I used Uncle Ben’s instant brown rice instead of white rice for a little extra fiber and nutritiousness, and I splashed on a little Tobasco chipotle pepper sauce when this dinner made its way to my bowl. Oh, and in my excitement to eat, I forgot the sprinkle of green onions. I don’t think the dish suffered as a result. Aaron loved this dish, he raved about it the entire time we were eating and had two gigantic bowls of the stuff. I thought it was good, too, though enthusiasm like that was hard to match. 😀

You can view the nutrtion informaton for this dish on the same page as the recipe. It’s got 413 calories, with only 5% of those coming from fat, and a whopping 10 grams of fiber. I looked up the Healthy Choice sausage that the recipe suggests, and found that it has a little less fat than the turkey sausage I used, but just by one gram of total fat and .5 grams more saturated fat. The dish is still very lean. I also added a gram or two of fiber by using brown rice instead of white.

This turned out to be a very cheap meal. I used $0.50 of dried red beans, $0.50 of green pepper, $0.25 of celery, $0.50 of red onion, $1.25 of turkey sausage, $1 of instant brown rice, and perhaps $0.50 for bay leaf, thyme, paprika, tobasco, garlic, and whatever else. The total cost of this dish, then, was about $4.50. Even though the recipe says it makes four servings, it looks more like five to me since we polished off three servings last night (due to Aaron’s great enjoyment of the dish and hunger from not bringing a lunch to work that day) and there looks to be plenty for lunch for both of us. Assuming there are only four servings, the cost per serving is about $1.13. If you get the five servings that I came up with, the cost is even better – just $0.90 per serving. Awesome. This is one of the cheapest meals on the blog so far, if not the cheapest.

What is the cheapest meal you make at home?

Cool Pasta Salad with Lime, Salmon, and Chickpeas

As you may know, Monday nights are my nights to do what fellow food blogger Wasabi Prime has termed “MacGyver Cooking.” This term comes from a television show called MacGyver that ran from 1985-1992. If you are unfamiliar with the character for which the show is named, here is a little blurb from wikipedia: “MacGyver employs his resourcefulness and his knowledge of chemistry, physics, technology, and outdoorsmanship to resolve what are often life-or-death crises. He creates inventions from simple items to solve these problems. These inventions became synonymous with the character and were called MacGyverisms by fans. MacGyver was unlike secret agents in other television series and films because, instead of relying on high-tech weapons and tools, he carried only a Swiss Army knife and duct tape.”

MacGyver is an extremely resourceful person who uses what he has on hand (things which are usually cheap, by the way!) to solve a problem. So, MacGyver cooking, or “MacGyverizing my dinner” is something that I do almost every Monday night when all that’s left in the kitchen are a few odds and ends and I have a dinner problem to solve. This week, I had half a box of bowtie pasta (I’ll post about what I did with the other half of the box later!), two cans of salmon, a can of chickpeas, some red onion, celery, parsley, a lime, and half a bottle of that yummy Newman’s Own lime vinaigrette from the spinach salad with avocado post a few days ago. Using my santoku knife rather than a Swiss army knife (as MacGyver would), this is what I came up with:

I'm calling it "Cool Pasta Salad with Lime, Salmon, and Chickpeas

I'm calling it "Cool Pasta Salad with Lime, Salmon, and Chickpeas."

I absolutely loved eating this. The textures were so interesting and pleasing – crunchy celery and onion, al dente pasta, meaty salmon chunks, and chickpea-textured chickpeas. The fresh lime and lime vinaigrette made the whole dish tangy and bright with just a little hint of sweetness (from the dressing). It looks very pretty, too. I was very impressed with this dish and would make it again for a pot-luck or picnic in a heartbeat. There are tons of leftovers, and I’m so looking forward to having another bowl for lunch. 😀

The pasta I used was Barilla Plus, which contains more protein, fiber, and Omega-3 than regular pasta. It tastes and looks virtually identical to regular white pasta. The boneless, skinless canned salmon was Chicken of the Sea brand. All Chicken of the Sea canned salmon is wild, Pacific salmon, which makes me happy because it is much cheaper than fresh wild salmon, and the Environmental Defense Fund says that, “Salmon caught in Alaska … are among the better-managed fish stocks in the U.S. They are also low in contaminants.” They say that it is safe to have four or more meals of wild salmon per month. Farmed salmon is a very different story. The EDF warns that adults should eat no more than ONE meal per month of farmed salmon, and that salmon farms “pollute surrounding waters with waste and chemicals.” By using canned wild salmon, I can enjoy a healthy, cheap meal with one of my favorite types of fish. The chickpeas are, of course, very healthy too. Nutritiondata.com says of chickpeas, “This food is very low in Saturated Fat and Cholesterol. It is also a good source of Dietary Fiber, Vitamin B6 and Folate, and a very good source of Manganese.” They also taste great and have a texture that I really enjoy.

pastasalad2

This meal was a cheap one indeed. The entire dish used about $1 of pasta, $3 of salmon, $0.75 of chickpeas, $1 of dressing, $0.30 of fresh lime, and $0.75 of celery, parsley, and onion, which brings the total cost to $6.80, if my math is right (and I’m always worried that it isn’t – Aaron will check in a moment when I get this posted, I’m sure). We will probably get five servings out of this. That means that this dish costs $1.36 per serving! You can barely buy a 24-ounce soda out of a vending machine for that. Wouldn’t you rather have a nice bowl of Cool Pasta Salad with Lime, (wild!) Salmon, and Chickpeas? 😀

pastasaladclose

Extreme Pasta Salad Close-Up!

I expect you’ll be wanting a recipe now. Here it is.

Recipe for Cool Pasta Salad with Lime, Salmon, and Chickpeas (makes about 5 servings):

What you need:

  • 1/2 box of Barilla Plus bowtie pasta
  • 2 5-ounce cans of wild salmon, excess liquid drained and fed to the cat
  • 1 can of chickpeas, drained and rinsed
  • 3 ribs of celery, diced
  • 1/2 cup red onion, diced
  • 1/2 cup of parsley, finely chopped
  • juice of one fresh lime
  • 1/2-3/4 cup of Newman’s Own Lighten Up Lime Vinaigrette (or make your own lime dressing)
  • salt and pepper, to taste

How to do it:

  1. Cook the pasta in boiling, lightly salted water until al-dente. Drain and rinse with cold water, until pasta is cooled off. Place pasta in a large mixing bowl and combine with the salmon, chickpeas, celery, onion, parsley, lime juice, and 1/2 cup of the lime vinaigrette. Toss the ingredients together to combine. If the pasta salad seems too dry, add more lime vinaigrette. Season with salt and pepper as needed.
  2. You can enjoy this right away, if you like, or allow the salad to get really good and cold in the fridge for a couple of hours before enjoying.
  3. Enjoy!
Try it. You'll like it.
Try it. You'll like it.

Fried Egg, Tomato, Mushrooms, and English Muffin

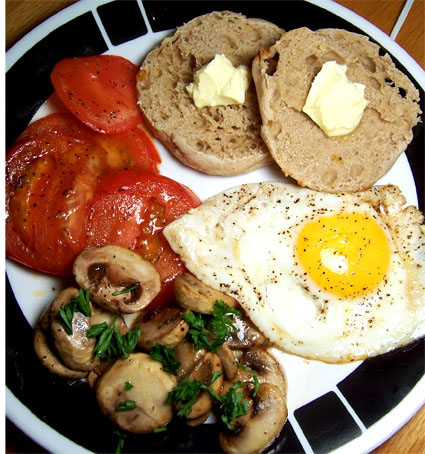
Yesterday I had to leave Richmond for most of the day, and since Aaron and I usually spend Saturdays together, this made me feel a little sad. I figured since I was leaving in the morning, I should make a big breakfast for us both, on account of how Aaron is notoriously bad at cooking. In a big skillet, I fried a couple of eggs, some fresh tomato slices, and some mushrooms in a little bit of light margarine and olive oil. I also toasted some whole-grain English muffins. We had a bowl of organic red grapes and glasses of orange juice as well (not shown).

Big Giant Breakfast

Big Giant Breakfast for the Boy who Can't Cook So Great.

The yolk oozed its yellow goodness onto the plate, where it mingled with the hot tomato juices and was sopped up with the crunchy English muffin. Aaron’s favorite part of the breakfast was the mushrooms, which soaked up a lot of flavor while sauteeing in the pan with the other good things.

breakfastcloseup

My favorite part, of course, was the egg. Aaron admitted that he cannot cook an egg sunny side up. He says that when he attempts it, the top does not get cooked at all, but the bottom burns. I admitted that I have real trouble cooking an egg over-easy, because I always manage to break the yolk. Sunny side up is no problem, though, as you can see!

eggcloseup

Readers, over the next couple of days I will be extremely busy. Tomorrow I start a new job AND I have my first day of online classes for my Master of Library Science. If you do not see another post from me until Wednesday or Thursday, or if my heart explodes from the stress of it all before I get to post again, please enjoy these breakfast photos. I will be having more eggs tomorrow morning to give me the energy to face The New Job and The New Classes all in one day. 🙂

breakfast3